Getting Started with Colored Pencil Drawing
Getting started can feel overwhelming. Even choosing just the right reference photo can feel like a daunting task…

o Is it the right subject?
o Is the lighting right?
o Is there too much going on in the composition?
When you’re new to colored pencil art, my advice is to keep it simple. Choose a reference photo with a singular subject, clear lighting, and an uncomplicated background. A simple still life, piece of fruit, flower, or other single object is often a great place to start.
If you want to tackle a more complex reference, consider cropping the image or enlargeing your subject. This allows you to concentrate on the details without becoming overwhelmed by the entire composition.
I especially love to look for subjects with unique or dramatic lighting. Strong highlights and shadows can make even a simple subject exciting to draw.
Creating Your Line Drawing
Once you’ve chosen your reference photo, the next step is to create an accurate line drawing for your colored pencil artwork.
There are several ways to do this; drawing. You can draw your subject freehand if you have that ability, use the grid method, trace your reference, or use a digital program to help create your outline.
I personally like using the free drawing app ibispaint. This app allows you to create layers; one for your image and another that allows you to trace your image digitally and print it as a line art. Once I’m happy with the outline, I can resize it to match my final artwork and print it out in the size I’m interested in.
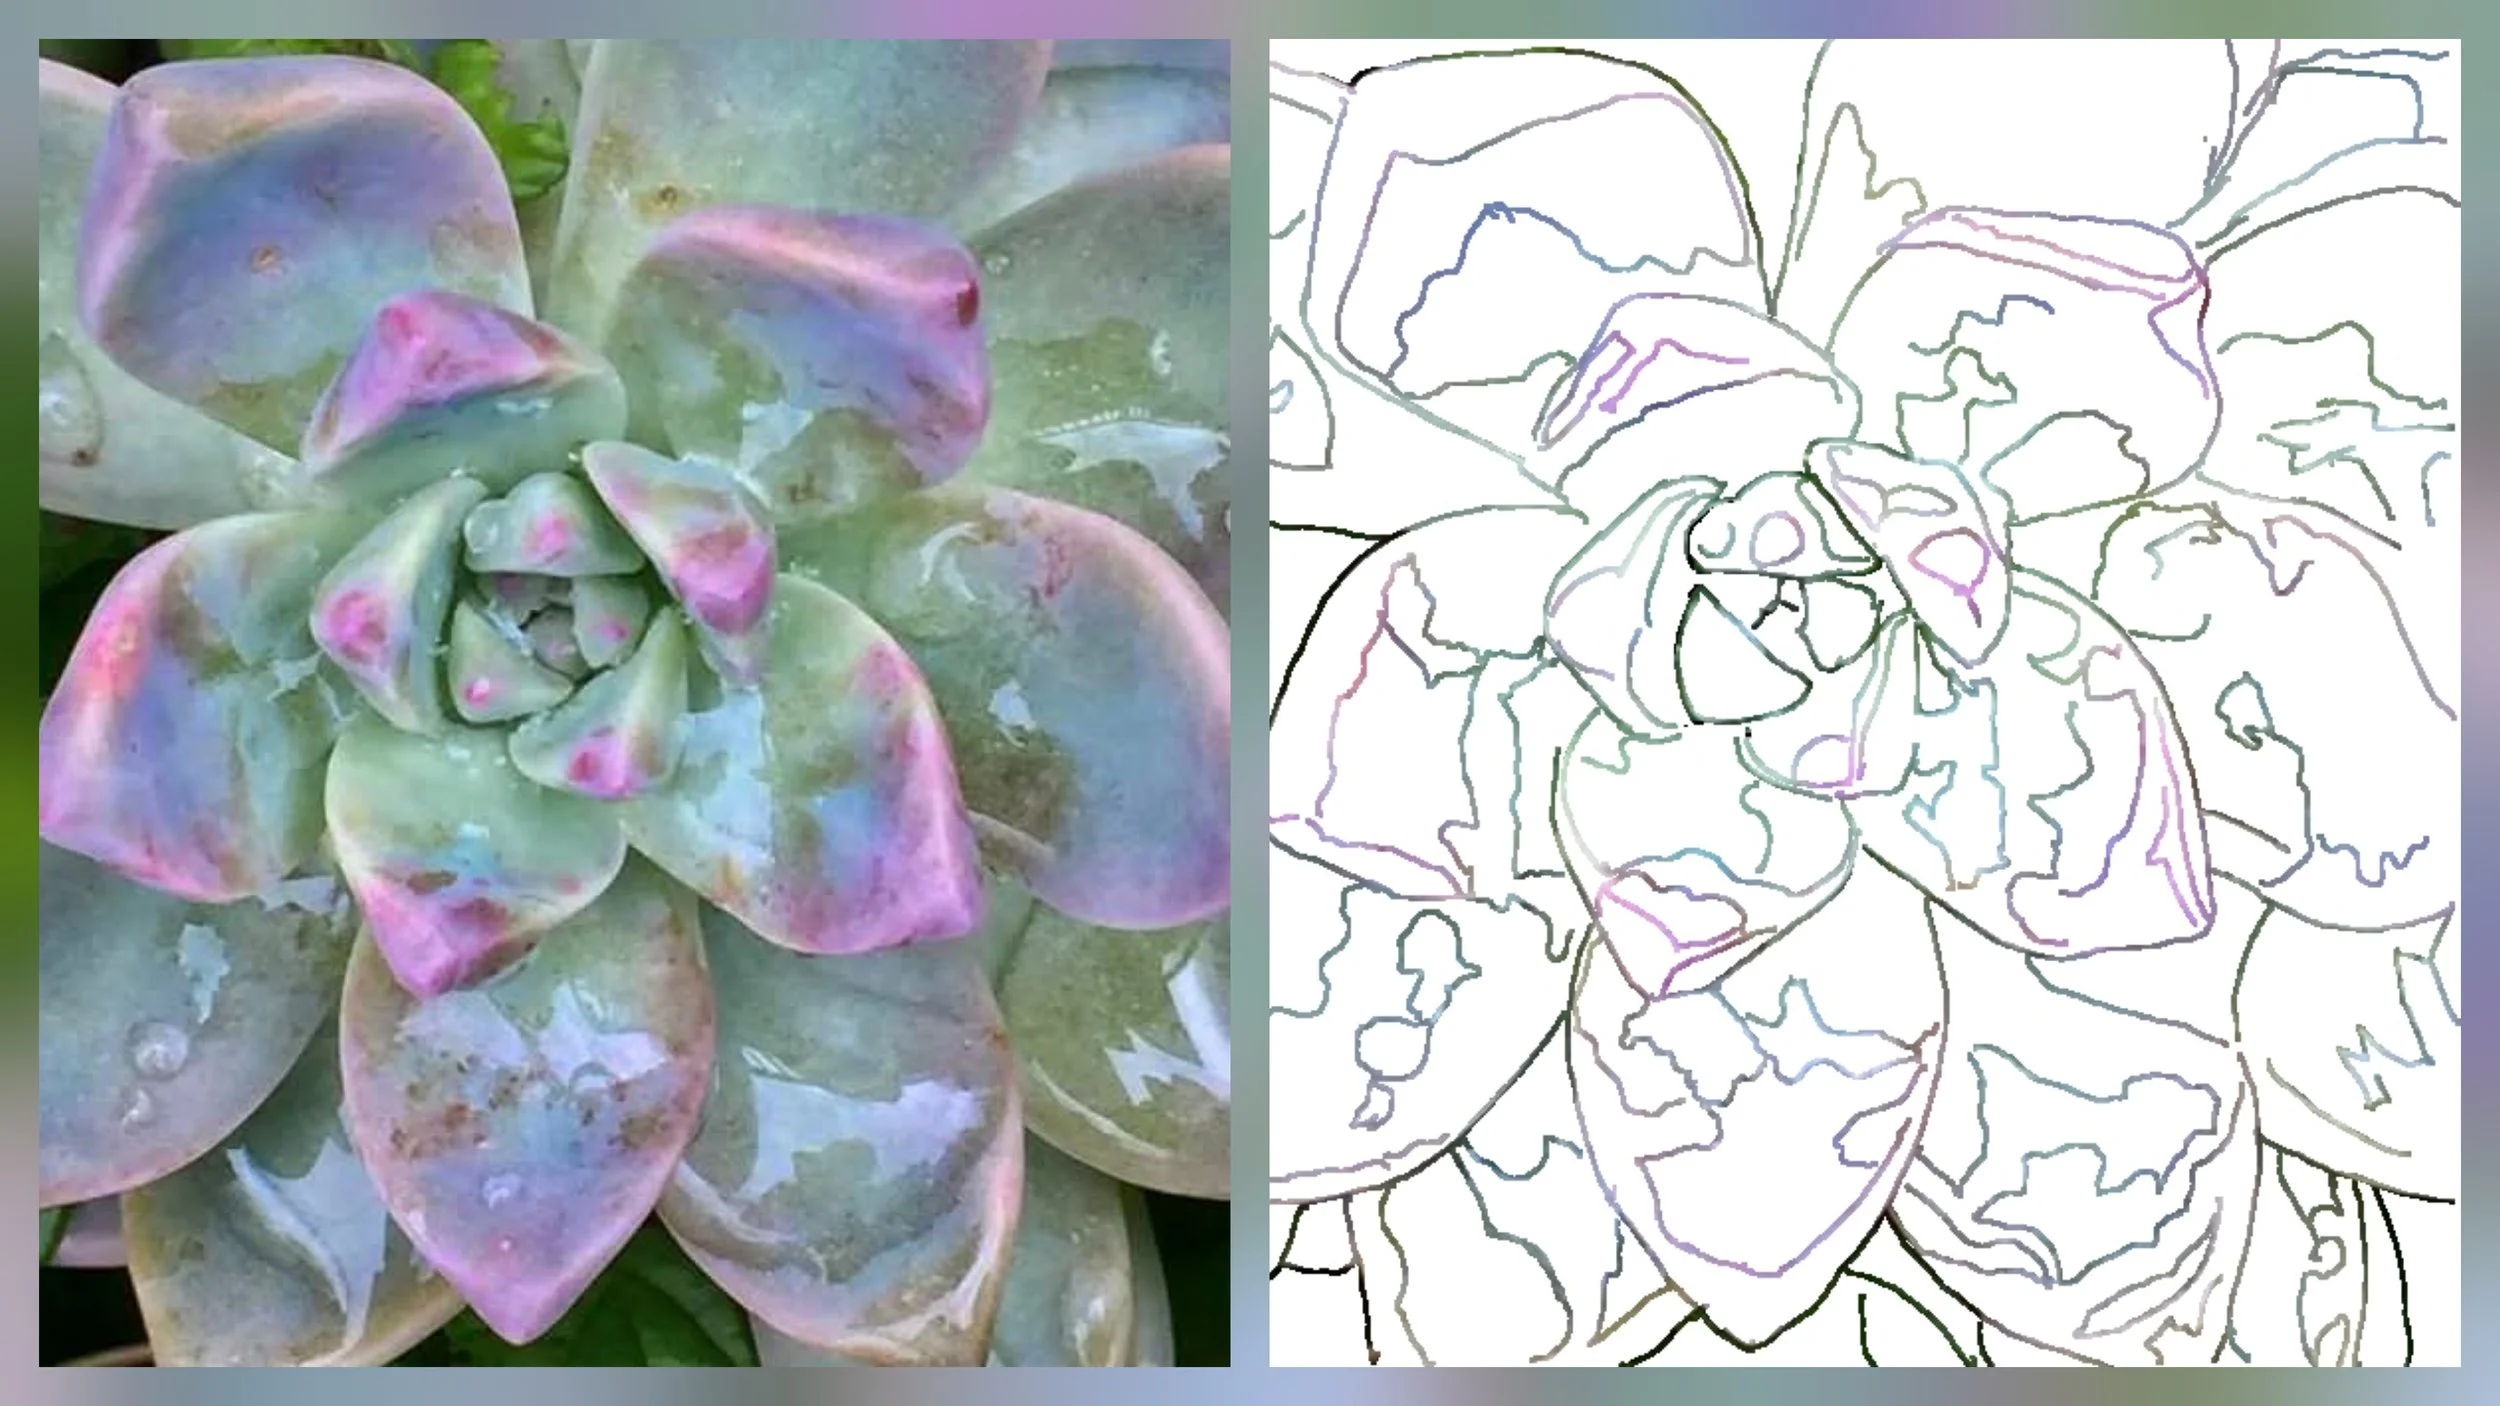
Don’t feel like using a tracing method somehow makes your artwork less legitimate. The line drawing is simply the foundation. The artistry comes from what you do next—your color choices, values, layering, textures, details, and all of the decisions that transform a simple outline into a finished piece of colored pencil art.
How to Transfer a Line Drawing to Your Paper
Once you have your line art you are ready to transfer it to your drawing surface. When I am working with Pastelmat I prefer using a light box. Tracing paper is another really good option so long as you use light pressure.
Keep your transferred lines as light as possible. Heavy graphite or transfer lines can become difficult to cover with colored pencil, particularly in light areas of your work.
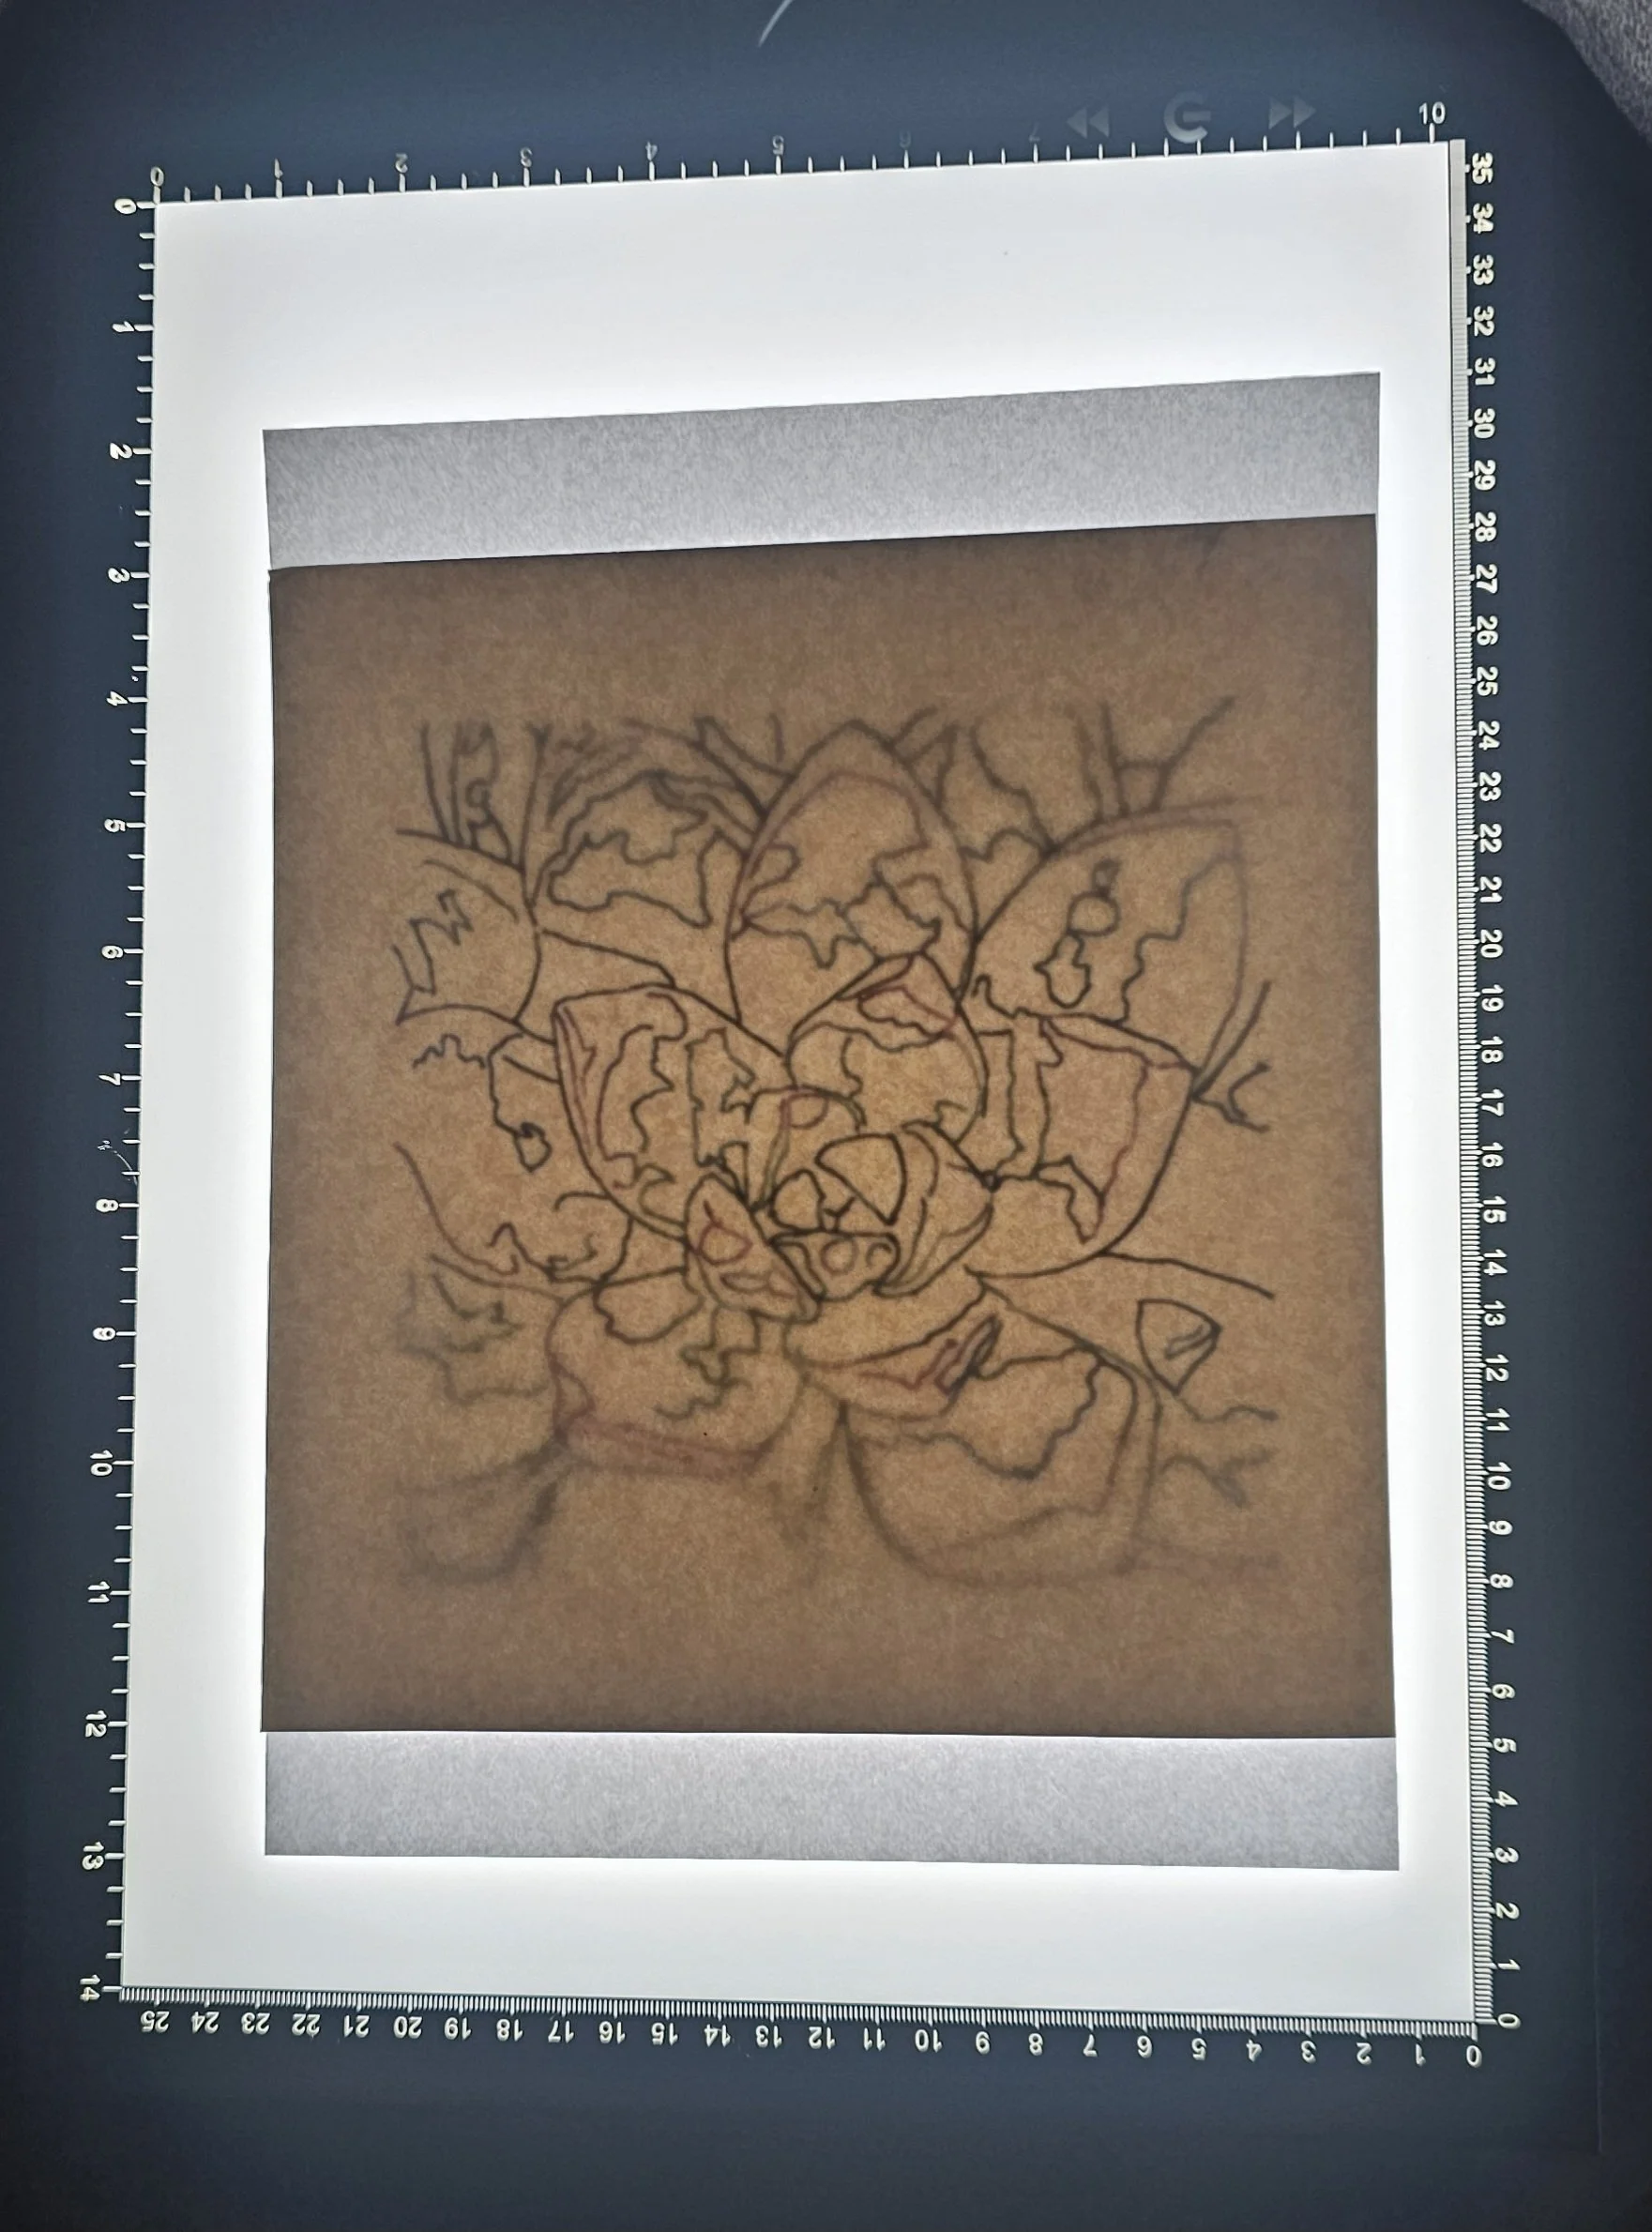
Before you begin adding color, check your drawing one last time. It’s easier to make adjustments now than after you’ve started building layers of colored pencil.
Choosing Your Colored Pencil Paper
Next is deciding on what paper you are going to use. Personally I think that Pastelmat is the easiest to start with because it is so forgiving. It is more difficult to locate as it is a specialty paper; I buy mine through www.blick.com. **See the Complete Guide for Color pencil supplies. Other options are drafting film or hot press watercolor papers but they just requires a different technique.
With your reference selected, line drawing transferred, and paper ready, you’ve created the foundation for your colored pencil artwork. Now the fun really begins—we start adding color!
In an upcoming post, I’ll show you how I begin those first layers and gradually build the rich color and detail that make colored pencil such an amazing fine-art medium.